How to Make Sourdough Bread (A Beginner-Friendly Tutorial)
If you’ve been curious about baking your own sourdough bread but weren’t sure where to start, you’re in the right place. In this beginner-friendly sourdough bread tutorial, I’ll walk you through my process step-by-step — from using an active starter to shaping and baking a beautiful loaf. I’m not a professional baker, just a home cook who fell in love with sourdough in November 2024 and hasn’t looked back.
My goal is to make this feel doable and encouraging, not intimidating. With a few simple tools, a little time, and plenty of grace, you can bake bread that’s every bit as delicious as what you’d buy at a bakery.

Recipe Steps
When I started my sourdough journey, I didn’t set out to become a bread baker. I just wanted to make something homemade and wholesome for my family. Over time, I’ve learned what works for me (and what doesn’t!) through a lot of trial, error, and flour on the counter.
Over the course of the year, I have shared my sourdough starter with a few friends, but they never ended up making bread because they weren’t sure what to do next. So, I decided to make this video and write out my process in detail.
I’m not a baking or sourdough expert, but this is exactly what I do to make delicious sourdough bread that my family and I love eating. If you’re new to sourdough or feel intimidated, I promise — you can do this too. Below is the detailed video tutorial I made, along with timestamps, for easy access to different parts of the process.
Getting Started
In order to bake sourdough bread, you need to have a starter. You can purchase dehydrated sourdough starter to hydrate and get started, get some starter from a frined, or make your own. I chose to make my own starter. It took about 12 days to get a strong active starter. I used King Arthur bread flour to make my starter. If you want to make your own, here is a recipe to make a sourdough starter.
Tools for Sourdough Bread Making & Baking
You don’t need any fancy equipment to make sourdough—just some time and patience! But if you want a few tools that make things a little easier (and maybe help your loaves look bakery-worthy), I’ve linked some of my favorites on my Shop.
If you decide to grab something through those links, it doesn’t cost you anything extra, but I may earn a small referral reward from Amazon or other retailers for sharing them.
To Get Started Making Sourdough Bread
It starts an active starter that you will feed and wait for it to at least double in size. Then follow the recipe and begin weighing out your ingredients and making bread.
Video Timestamps:
Use the timestamps below to jump to specific pats of the sourdough bread making process.
00:00 Introduction & Ingredients
01:45 Initial mix of dough
04:25 What shaggy dough looks like
05:49 Window pane test
06:09 Dough after mixing & beginning of bulk fermentation
07:44 How I put sourdough starter in the fridge
11:17 Stretch & Folds #1
13:36 Stretch & Folds #2
15:00 Stretch & Folds #3 – gentler coil folds
17:30 Stretch & Folds #4 – gentler coil folds
22:04 Bulk fermentation complete
24:19 Dough shaping & bench rest
27:47 Prepare bannetons
30:42 Final shaping and placing in banneton
32:04 Adding inclusions (advanced optional step)
37:14 Scoring and baking with the lid on
43:02 Removing lid & continuing to bake
43:56 Removing from oven & temping
46:43 Storage options for sourdough
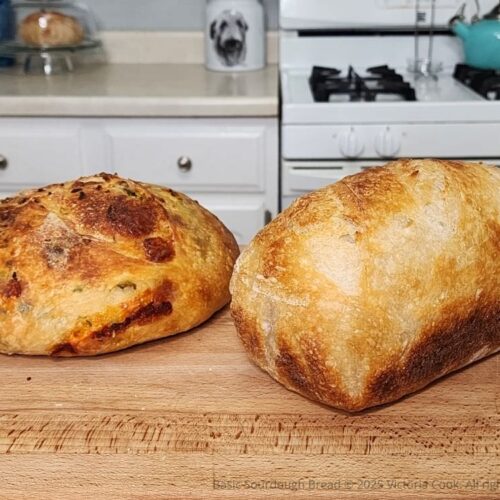
57:51 Baked bread crumb reveal
Basic Sourdough Bread
Equipment
- 1 Digital Scale that measures grams
- 1 Dutch oven or roaster with lid
- 1 Bench scraper
- 1 Container of rice flour to flour bannetons or containers for dough
- 1 Stand Mixer with the paddle and dough hook attachments optional
- 1 Spray bottle optional
- 1 Bread lame optional
- 1 Baker's dusting wand optional for sprinkling rice flour
Ingredients
- 200 g active sourdough starter
- 650 g water
- 500 g King Arthur organic bread flour
- 500 g King Arthur organic all-purpose flour
- 20 g salt
Instructions
- Feed your sourdough starter and wait until it doubles in size and becomes bubbly and active before using it to bake.
- Measure the flours. Place a large mixing bowl on a food scale and zero it out. Add 500 grams of all-purpose flour, then zero it again and add 500 grams of bread flour. Set aside.
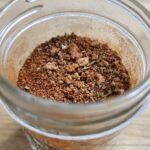
- Measure the salt. In a small bowl, zero out your food scale and measure 20 grams of salt (I use fine pink Himalayan salt).
- Measure the water. Place a large 4-cup measuring cup on the scale, zero it out, and add 650 grams of water.
- Measure the starter. Place your stand mixer bowl on the scale, zero it out, and add 200 grams of active starter.Pro Tip: No stand mixer? No problem! You can mix by hand—it’s just a little messier.
- Combine starter and water. Add the water to the starter and mix with the paddle attachment on low for 1–2 minutes, until the mixture looks milky.Pro Tip: Note the time you start mixing—this marks the beginning of your bulk fermentation timeline.
- Add flour and salt. Switch to the dough hook and mix on low until the dough starts to come together in a shaggy mass. Increase to medium-low and mix for 6–7 minutes.If your mixer gets warm, pause and let it cool before continuing. Be sure to keep an eye on it—mixers can “walk” across the counter!Pro Tip: Mixing by hand? Stir until everything is incorporated into a shaggy dough. It doesn’t need to pass the windowpane test yet; gluten will develop during stretch and folds.
- Check gluten development. After 6–7 minutes, your dough should look smoother (though still sticky) with the sides of the bowl mostly clean.Pinch off a small piece and perform the windowpane test—stretch gently until light shines through without tearing. If it tears, mix another minute or two and test again. Once it passes, transfer the dough to a glass bowl, cover with plastic wrap or a disposable shower cap, and let rest for one hour.Pro Tip: Sourdough ferments faster when warm and slower when cool. Record your dough’s temperature with a digital thermometer and use The Sourdough Journey’s Bulk Fermentation Guide to estimate timing. To speed things up, place your covered bowl in the oven with the light on (no heat). Just be sure to block the start button so no one accidentally turns it on!
- First stretch and fold. After one hour, uncover the dough. Wet your dominant hand, reach under the dough, and stretch it upward without tearing. Fold it back over itself, rotate the bowl ¼ turn, and repeat until you’ve completed a total of four folds. Record the dough temperature, cover, and set a timer for one hour. Repeat this stretch-and-fold cycle every hour three more times.Pro Tip: Timing doesn’t have to be exact—fit sourdough into your life, not the other way around.
- Switch to coil folds. By the third round, the dough should be more bubbly. Wet both hands, gently reach under the dough on opposite sides, lift it straight up, and fold it over itself. Rotate the bowl ¼ turn and repeat three more times. Handle the dough gently and avoid tearing. Cover and rest one hour, then complete one more round of coil folds.
- Monitor bulk fermentation. Based on your dough temperature and The Sourdough Journey chart, keep checking the dough hourly. It’s ready when it’s bubbly, jiggly, easily pulls from the bowl sides, and slowly springs back when gently pressed.
- Divide and pre-shape. Lightly mist your hands and bench scraper with cool water. Turn the dough onto a clean surface and divide in half. Shape each half into a ball by dragging it toward you while tucking wi the dough under itself with the scraper to build tension. Cover with a towel and rest 10 minutes.Note: I never use extra flour here—just reapply water if the dough feels a little sticky.
- Prepare containers for cold retard. If not using bannetons, small bowls or loaf pans work well. Lightly mist with water and dust with rice flour to prevent sticking.
- Final shaping. After the 10-minute rest, shape each dough ball depending on your container:For a round loaf, fold the dough in half, then bring the ends toward the center and place smooth side down.For an oblong loaf, stretch gently into a rectangle, fold in thirds lengthwise, then roll up from the short end, creating surface tension.Sprinkle lightly with rice flour and cover each loaf with plastic wrap or a shower cap.
- Cold retard. Refrigerate for at least 8 hours or overnight. This slows fermentation and develops flavor.
- Preheat for baking. When ready to bake, preheat your oven and Dutch oven (or covered stoneware) to 500°F. If both baking vessels fit side-by-side, bake both loaves at once; otherwise, bake one at a time.Pro Tip: For easier scoring or intricate designs, chill dough in the freezer for 20 minutes before scoring.
- Score the dough. Turn out each loaf onto parchment paper or a silicone sling. Score the top with a razor or bread lame—a single slash works, or try a design. Move quickly and confidently when scoring!Pro Tip: If scoring feels difficult, the dough may be over-proofed, or your blade isn’t sharp enough.
- Bake. Carefully transfer the scored dough to the hot Dutch oven. Mist the dough lightly with water or place a few ice cubes beneath the parchment for steam. this helps create the blisters on the crust. Cover and bake for 20 minutes.
- Finish baking. Lower the oven to 450°F, remove the lid, and bake another 22–30 minutes, depending on your desired crust color. The bread is done when it reaches 205°F internally.
- Cool completely. Transfer the loaves to a wire rack and let cool for at least 2 hours before slicing. Cutting too soon traps steam inside, leaving the crumb gummy.
Video

Victoria Cook
Victoria is a passionate home cook who became the host and chef of over 100 episodes of a private cooking show tailored for wellness practitioners and their patients. With a love for ethnic cuisines, she enjoys using a variety of spices and fresh ingredients to create flavorful, healthy meals for her husband and son. Always up for a culinary challenge, Victoria finds joy in experimenting with new recipes—and if she can whip them up in an electric pressure cooker, she’s even happier.
Affiliate Disclosure
This website includes affiliate links for products I genuinely love and use. If you click on a link and make a purchase, I may earn a small commission at no extra cost to you. Thank you for supporting my work!