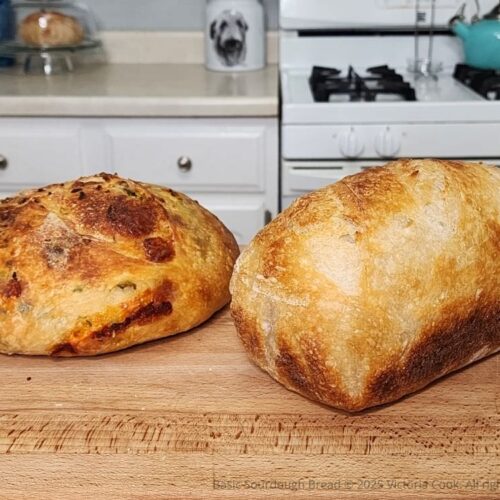
Basic Sourdough Bread
Equipment
- 1 Digital Scale that measures grams
- 1 Dutch oven or roaster with lid
- 1 Bench scraper
- 1 Container of rice flour to flour bannetons or containers for dough
- 1 Stand Mixer with the paddle and dough hook attachments optional
- 1 Spray bottle optional
- 1 Bread lame optional
- 1 Baker's dusting wand optional for sprinkling rice flour
Ingredients
- 200 g active sourdough starter
- 650 g water
- 500 g King Arthur organic bread flour
- 500 g King Arthur organic all-purpose flour
- 20 g salt
Instructions
- Feed your sourdough starter and wait until it doubles in size and becomes bubbly and active before using it to bake.
- Measure the flours. Place a large mixing bowl on a food scale and zero it out. Add 500 grams of all-purpose flour, then zero it again and add 500 grams of bread flour. Set aside.
- Measure the salt. In a small bowl, zero out your food scale and measure 20 grams of salt (I use fine pink Himalayan salt).
- Measure the water. Place a large 4-cup measuring cup on the scale, zero it out, and add 650 grams of water.
- Measure the starter. Place your stand mixer bowl on the scale, zero it out, and add 200 grams of active starter.Pro Tip: No stand mixer? No problem! You can mix by hand—it’s just a little messier.
- Combine starter and water. Add the water to the starter and mix with the paddle attachment on low for 1–2 minutes, until the mixture looks milky.Pro Tip: Note the time you start mixing—this marks the beginning of your bulk fermentation timeline.
- Add flour and salt. Switch to the dough hook and mix on low until the dough starts to come together in a shaggy mass. Increase to medium-low and mix for 6–7 minutes.If your mixer gets warm, pause and let it cool before continuing. Be sure to keep an eye on it—mixers can “walk” across the counter!Pro Tip: Mixing by hand? Stir until everything is incorporated into a shaggy dough. It doesn’t need to pass the windowpane test yet; gluten will develop during stretch and folds.
- Check gluten development. After 6–7 minutes, your dough should look smoother (though still sticky) with the sides of the bowl mostly clean.Pinch off a small piece and perform the windowpane test—stretch gently until light shines through without tearing. If it tears, mix another minute or two and test again. Once it passes, transfer the dough to a glass bowl, cover with plastic wrap or a disposable shower cap, and let rest for one hour.Pro Tip: Sourdough ferments faster when warm and slower when cool. Record your dough’s temperature with a digital thermometer and use The Sourdough Journey’s Bulk Fermentation Guide to estimate timing. To speed things up, place your covered bowl in the oven with the light on (no heat). Just be sure to block the start button so no one accidentally turns it on!
- First stretch and fold. After one hour, uncover the dough. Wet your dominant hand, reach under the dough, and stretch it upward without tearing. Fold it back over itself, rotate the bowl ¼ turn, and repeat until you’ve completed a total of four folds. Record the dough temperature, cover, and set a timer for one hour. Repeat this stretch-and-fold cycle every hour three more times.Pro Tip: Timing doesn’t have to be exact—fit sourdough into your life, not the other way around.
- Switch to coil folds. By the third round, the dough should be more bubbly. Wet both hands, gently reach under the dough on opposite sides, lift it straight up, and fold it over itself. Rotate the bowl ¼ turn and repeat three more times. Handle the dough gently and avoid tearing. Cover and rest one hour, then complete one more round of coil folds.
- Monitor bulk fermentation. Based on your dough temperature and The Sourdough Journey chart, keep checking the dough hourly. It’s ready when it’s bubbly, jiggly, easily pulls from the bowl sides, and slowly springs back when gently pressed.
- Divide and pre-shape. Lightly mist your hands and bench scraper with cool water. Turn the dough onto a clean surface and divide in half. Shape each half into a ball by dragging it toward you while tucking wi the dough under itself with the scraper to build tension. Cover with a towel and rest 10 minutes.Note: I never use extra flour here—just reapply water if the dough feels a little sticky.
- Prepare containers for cold retard. If not using bannetons, small bowls or loaf pans work well. Lightly mist with water and dust with rice flour to prevent sticking.
- Final shaping. After the 10-minute rest, shape each dough ball depending on your container:For a round loaf, fold the dough in half, then bring the ends toward the center and place smooth side down.For an oblong loaf, stretch gently into a rectangle, fold in thirds lengthwise, then roll up from the short end, creating surface tension.Sprinkle lightly with rice flour and cover each loaf with plastic wrap or a shower cap.
- Cold retard. Refrigerate for at least 8 hours or overnight. This slows fermentation and develops flavor.
- Preheat for baking. When ready to bake, preheat your oven and Dutch oven (or covered stoneware) to 500°F. If both baking vessels fit side-by-side, bake both loaves at once; otherwise, bake one at a time.Pro Tip: For easier scoring or intricate designs, chill dough in the freezer for 20 minutes before scoring.
- Score the dough. Turn out each loaf onto parchment paper or a silicone sling. Score the top with a razor or bread lame—a single slash works, or try a design. Move quickly and confidently when scoring!Pro Tip: If scoring feels difficult, the dough may be over-proofed, or your blade isn’t sharp enough.
- Bake. Carefully transfer the scored dough to the hot Dutch oven. Mist the dough lightly with water or place a few ice cubes beneath the parchment for steam. this helps create the blisters on the crust. Cover and bake for 20 minutes.
- Finish baking. Lower the oven to 450°F, remove the lid, and bake another 22–30 minutes, depending on your desired crust color. The bread is done when it reaches 205°F internally.
- Cool completely. Transfer the loaves to a wire rack and let cool for at least 2 hours before slicing. Cutting too soon traps steam inside, leaving the crumb gummy.
Video
Tried this recipe?Let us know how it was!